Building a Desktop App using Svelte and Electron
February 22, 2020
I watched a talk the other day by Felix Riesberg who talked about using JavaScript and Electron to build desktop apps and it inspired me to see how easy using Svelte would be. Turns out it is super easy, and just works out of the box!
If you just want a starter template to make your app without reading the blogpost, I created a template here.
This blogpost will walk you through creating a basic markdown editor for the desktop using Svelte and Electron. We will be able to edit markdown files and see a side-by-side preview as well as Open Files, Create New Files and Save Files using the Electron API and NodeJS.
You can find the code for the finished product here: https://github.com/Pjaerr/Svelte-Electron-Desktop-App which looks like:
Let’s get started!
Getting Setup 🐣
Clone the Svelte template:
npx degit sveltejs/template svelte-markdown-editorCD into the new directory and run
npm installto install Svelte dependencies.Run
npm install electron markedwhich will install Electron and then the marked library which we will use to convert our markdown into HTML.In the root of the project, create a
main.jsfile, this will be our Electron entry point.Also in the root, create a
preload.jsfile, this will be the file that allows our renderer (Svelte) to communicate with electron.Inside of the
package.json, change thestartscript from"sirv public --no-clear"to"npm run build && electron main.js"which will build the Svelte app and then tell Electron to run it.Edit the
public/index.htmlfile so that all paths have a.infront of them. EG:/build/bundle.cssbecomes./build/bundle.css. Electron won’t be able to find these files otherwise.Finally, add the following meta tag to the head of the index.html file:
<meta http-equiv="Content-Security-Policy" content="script-src 'self' 'unsafe-inline';" />. This won’t cause us any issues for this small application, but we will get a warning in our console if not. Read more about this here
Connecting Svelte with Electron 🖇️
Now we have the boilerplate setup, let’s connect our Svelte app with Electron by returning to the main.js file we previously created.
A basic Electron app consists of an app and a BrowserWindow so let’s import these as well as the path module which we’ll need to tell Electron where our preload.js file is:
const { app, BrowserWindow } = require("electron");

const path = require("path");
The app is what we use to handle the lifecycle of the application and the BrowserWindow is the actual window that will render our Svelte app.
Start by creating a new BrowserWindow once the application is ready, we can also handle quitting the app once all windows are closed:
app.whenReady().then(() => {
  const mainWindow = new BrowserWindow({
    width: 800,
    height: 600,
    webPreferences: {
      nodeIntegration: false,
      contextIsolation: true,
      preload: path.join(__dirname, "preload.js"),
    },
  });
});

app.on("window-all-closed", () => {
  app.quit();
});
Note we set nodeIntegration to false, this is the electron default. If we set nodeIntegration to true (and contextIsolation to false), it would allow us to use node.js directly within our Svelte files, this comes with security concerns and Electron officially recommends using a preload.js file to interact with node.js instead of doing it directly. More on this later.
We also use the path module to tell our BrowserWindow where to find the preload.js file.
Finally, underneath where you created your BrowserWindow, tell it to open the index.html file that Svelte outputs when built.
app.whenReady().then(() => {
  const mainWindow = new BrowserWindow({
    width: 800,
    height: 600,
    webPreferences: {
      nodeIntegration: false,
      contextIsolation: true,
      preload: path.join(__dirname, "preload.js"),
    },
  });

  mainWindow.loadFile("./public/index.html");
});
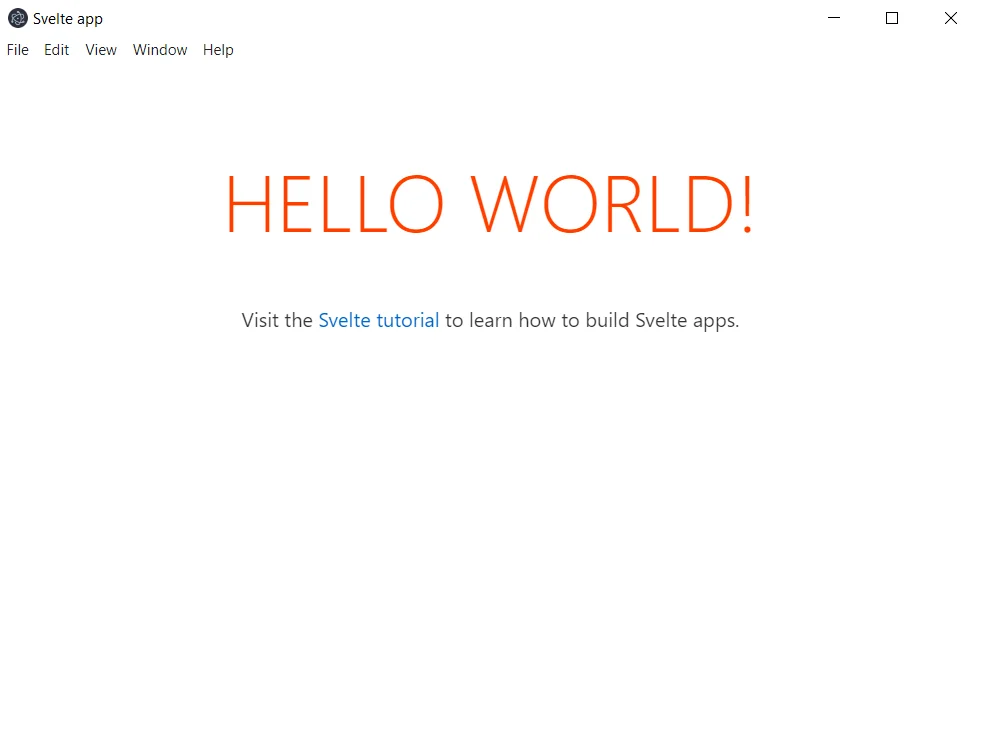
Now, if you run npm start, a window should open showing the basic Hello World Svelte app.
Creating a Basic Markdown Editor 📝
Before we implement the ability to open, save and create new files using the Electron API, let’s remove the Svelte boilerplate and implement a basic Markdown editor.
In the src/main.js file, remove the props argument:
const app = new App({
  target: document.body,
});
Next, create a component called Editor.svelte:
<script>
  export let markdown = "";
</script>

<style>
  section {
    width: 100%;
    min-height: 95vh;
    border: 0.1rem solid #333;
    flex: 1.5;
  }

  textarea {
    width: 100%;
    height: 100%;
    min-height: 95vh;
    resize: none;
    margin: 0;
    border: none;
  }
</style>

<section>
  <!-- svelte-ignore a11y-autofocus -->
  <textarea bind:value="{markdown}" autofocus />
</section>
This component takes a prop called markdown and binds it to a text area so that the markdown variable automatically updates when our text area is updated. We also autofocus the text area and remove the accessiblity warning as our application only has one input and it is the main focus of the application.
Next, create a component called Preview.svelte:
<script>
  import { marked } from "marked";

  export let markdown = "";
</script>

<style>
  section {
    width: 100%;
    min-height: 95vh;
    margin-left: 0.5rem;
    padding: 0.2rem;
    flex: 2;
    background-color: #f5f5f5;
  }

  section :global(*) {
    word-break: break-word;
    white-space: pre-wrap;
  }
</style>

<section>{@html marked(markdown)}</section>
This component takes some markdown text, and then uses the marked library to convert it to html. We then directly output this onto the page using the Svelte {@html} tag.
There’s nothing fancy with any of the styling, you’ll note we use :global(*) to target everything under our section. This is because we want to target all of the HTML under the section but Svelte thinks that no HTML exists (because it is dynamically generated once we parse the markdown) so we would get the css-unused-selector warning if we just used *.
In the App.svelte file replace everything with:
<script>
  import Editor from "./Editor.svelte";
  import Preview from "./Preview.svelte";

  let markdown =
    "# You can enter markdown here\n\n**This text is bold**\n\n_This text is italic_";

  let activeFilePath;
</script>

<style>
  main {
    display: flex;
    flex-direction: column;
  }

  .file-path {
    font-weight: bold;
  }

  .editor-and-preview {
    display: flex;
    flex-direction: row;
  }
</style>

<main>
  <p class="file-path">
    {activeFilePath ? activeFilePath : "Press 'Save' or hit 'CTRL + S' to save"}
  </p>

  <div class="editor-and-preview">
    <Editor bind:markdown />
    <Preview {markdown} />
  </div>
</main>
Here we store a markdown variable and tell Svelte to bind it to whatever the value of markdown is inside of the Editor component which we know is bound to the text area input. So whatever we type is stored inside the markdown variable, which we then pass into the Preview component to be rendered as HTML.
We also store an activeFilePath variable, which we will use later on to show which file is open in the editor, for now, whilst no file path exists, just show the user a message telling them how to save.
Now if you run npm start you should have a usable markdown editor with a live updating preview.
Saving Files with Electron 💾
Now we can write our markdown, let’s give the user the ability to save what they’ve written.
We first need to do some setup to allow our renderer (Svelte files) to communicate with Electron.
In the preload.js file we created earlier, import two modules from electron:
const { contextBridge, ipcRenderer } = require("electron");
contextBridge allows us to expose functionality to our renderer, this is important as our preload.js file has direct access to node.js (and the functions required to communicate with Electron) whereas our renderer doesn’t so we can use the contextBridge to provide a “bridge” between the two.
ipcRenderer is the module we use to communicate with our main Electron process. This allows us to both listen for messages from Electron as well as send messages to Electron.
To start, we can create a wrapper that can be accessed by the renderer (Svelte). I’m going to call this "api" but you can call it anything. Inside of this we’ll expose two functions send() and on() which will be used to send messages to electron and listen for messages back respectively:
const { contextBridge, ipcRenderer } = require("electron");

contextBridge.exposeInMainWorld("api", {
  send: (message, data) => {
    ipcRenderer.send(message, data);
  },
  on: (message, listener) => {
    ipcRenderer.on(message, listener);
  },
});
Now, inside of our App.svelte file, we can now access this via window.api without ever needing to use node.js directly.
Inside of App.svelte in the script tag, let’s use the window.api.on() function to listen for a "savefile" message (the message name can be anything you want, it just has to match the event we send), we will eventually send this message from Electron when the user clicks a menu item or uses CTRL + S.
<script>
  import Editor from "./Editor.svelte";
  import Preview from "./Preview.svelte";

  let markdown =
    "# You can enter markdown here\n\n**This text is bold**\n\n_This text is italic_";

  let activeFilePath;

  window.api.on("savefile", () => {});
</script>
When we receive a “savefile” message, it will run the callback we passed to it, inside of this function we want to first check if there is an activeFilePath and if there is, we want to send a message to Electron telling it to set the markdown variable to the contents of that file and if there isn’t, we want to send a message telling Electron to ask the user where the file should be saved.
This looks like the following:
<script>
  import Editor from "./Editor.svelte";
  import Preview from "./Preview.svelte";

  let markdown =
    "# You can enter markdown here\n\n**This text is bold**\n\n_This text is italic_";

  let activeFilePath;

  window.api.on("savefile", () => {
  if (activeFilePath) {
    window.api.send("saveexistingfile", {
      path: activeFilePath,
      content: markdown,
    });
  } else {
    window.api.send("savenewfile", markdown);
  }
});
</script>
This won’t do anything yet, as we haven’t implemented the corresponding message listeners and functionality in our main process (main process is what I have been calling “Electron”). Let’s do that next, starting with saving a new file.
In the main.js file, import Menu, MenuItem, ipcMain and dialog from electron and fs from the nodejs standard library:
const {
  app,
  BrowserWindow,
  Menu,
  MenuItem,
  ipcMain,
  dialog,
} = require("electron");

const path = require("path");

const fs = require("fs");
next, create a function called createNewFile inside of the app.whenReady().then callback that takes a string, this function should open a dialog box to ask the user to name a file and select a location to which it should be saved and then save the file at that location, with the name containing the string provided.
*Documentation for dialog can be found at https://www.electronjs.org/docs/api/dialog
Inside of the app.whenReady().then callback:
app.whenReady().then(() => {
  const mainWindow = new BrowserWindow({
    width: 800,
    height: 600,
    webPreferences: {
      nodeIntegration: false,
      contextIsolation: true,
      preload: path.join(__dirname, "preload.js"),
    },
  });

  mainWindow.loadFile("./public/index.html");

  const createNewFile = (content) => {
    dialog
      .showSaveDialog({
        title: "Create New File",
        properties: ["showOverwriteConfirmation"],
        filters: [
          {
            name: "Markdown Files",
            extensions: ["md"],
          },
        ],
      })
      .then(({ canceled, filePath }) => {
        if (canceled) return;

        fs.writeFile(filePath, content, (err) => {
          if (err) return;
        });
      });
  };
});
In the code above, we use Electron.dialog to open a save dialog that will only save (and show) markdown files and then, if the user didn’t close the dialog, we use the fs module to write the file to the file path they selected.
Now we have the function, let’s setup the code to call it when we receive a "savenewfile" message.
In the same place, write the following code:
app.whenReady().then(() => {
  const mainWindow = new BrowserWindow({
    width: 800,
    height: 600,
    webPreferences: {
      nodeIntegration: false,
      contextIsolation: true,
      preload: path.join(__dirname, "preload.js"),
    },
  });

  mainWindow.loadFile("./public/index.html");

  const createNewFile = (content) => {
    dialog
      .showSaveDialog({
        title: "Create New File",
        properties: ["showOverwriteConfirmation"],
        filters: [
          {
            name: "Markdown Files",
            extensions: ["md"],
          },
        ],
      })
      .then(({ canceled, filePath }) => {
        if (canceled) return;

        fs.writeFile(filePath, content, (err) => {
          if (err) return;
        });
      });
  };

  ipcMain.on("savenewfile", (e, content) => {
    createNewFile(content);
  });
});
There’s one last step before we can save a new file, if you remember, the message listener above only triggers when our Svelte app sends a “savenewfile” message, which can only be sent when our Svelte app receives a “savefile” message. So we must send a “savefile” message from Electron when the user selects save from the menu or hits CTRL + S.
You do this by creating a new Menu inside of the app.whenReady().then callback and then adding MenuItem objects to it like so:
app.whenReady().then(() => {
  const mainWindow = new BrowserWindow({
    width: 800,
    height: 600,
    webPreferences: {
      nodeIntegration: false,
      contextIsolation: true,
      preload: path.join(__dirname, "preload.js"),
    },
  });

  mainWindow.loadFile("./public/index.html");

  const createNewFile = (content) => {
    dialog
      .showSaveDialog({
        title: "Create New File",
        properties: ["showOverwriteConfirmation"],
        filters: [
          {
            name: "Markdown Files",
            extensions: ["md"],
          },
        ],
      })
      .then(({ canceled, filePath }) => {
        if (canceled) return;

        fs.writeFile(filePath, content, (err) => {
          if (err) return;
        });
      });
  };

  ipcMain.on("savenewfile", (e, content) => {
    createNewFile(content);
  });

  const menu = new Menu();

  menu.append(
    new MenuItem({
      label: "Save",
      accelerator: "CmdOrCtrl+S",
      click: () => mainWindow.webContents.send("savefile"),
    })
  );

  Menu.setApplicationMenu(menu);
});
Here we are saying, when CTRL + S is pressed, or our menu item with the label “Save” is clicked, send a message to the BrowserWindow (our Svelte app) with the name "savefile".
Now if you run npm start, type some markdown, and then hit CTRL + S (or the menu item). You should see a save dialog and when you enter a name and click save, your file should now have saved to the directory you chose.
The next part is adding the message listener for when we want to save an existing file. In the same place as the previous one, add the following:
app.whenReady().then(() => {
  ...

  ipcMain.on("savenewfile", (e, content) => {
    createNewFile(content);
  });

  ipcMain.on("saveexistingfile", (e, { path, content }) => {
    fs.writeFile(path, content, (err) => {
      if (err) return;
    });
  });

  ...
});
This just uses the fs module to create a new file at an existing path which will overwrite the existing file with the new contents.
You can read more about how the Renderer and Main processes work here
Next we will add the ability to open/save an existing file, or to create a new one using the menu.
Opening/Saving Existing Files 📂 💾
This works in much the same way, I would say even easier!
Start by, in the App.svelte file, creating a new message listener that listens for a "fileopened" message that contains a file path and the content inside of the file. When we get this message, update the variables so that Svelte will update our HTML:
<script>
  import Editor from "./Editor.svelte";
  import Preview from "./Preview.svelte";

  let markdown =
    "# You can enter markdown here\n\n**This text is bold**\n\n_This text is italic_";

  let activeFilePath;

  window.api.on("savefile", () => {
    if (activeFilePath) {
      window.api.send("saveexistingfile", {
        path: activeFilePath,
        content: markdown,
      });
    } else {
      window.api.send("savenewfile", markdown);
    }
  });

  window.api.on("fileopened", (e, { path, content }) => {
    activeFilePath = path;

    markdown = content;
  });
</script>
and then in the main.js file, in the same place as the createNewFile function, create a openFile function that will present the user with similar dialog but for choosing an existing file:
app.whenReady().then(() => {
  ...

  const createNewFile = (content) => {
    dialog
      .showSaveDialog({
        title: "Create New File",
        properties: ["showOverwriteConfirmation"],
        filters: [
          {
            name: "Markdown Files",
            extensions: ["md"],
          },
        ],
      })
      .then(({ canceled, filePath }) => {
        if (canceled) return;

        fs.writeFile(filePath, content, (err) => {
          if (err) return;
        });
      });
  };

  const openFile = () => {
    const file = dialog.showOpenDialogSync(mainWindow, {
      properties: ["openFile"],
      filters: [{ name: "Markdown Files", extensions: ["md"] }],
    });

    if (file) {
      fs.readFile(file[0], "utf8", (err, data) => {
        if (err) return;

        mainWindow.webContents.send("fileopened", {
          path: file[0],
          content: data,
        });
      });
    }
  };

  ...
});
We get the user’s selection, read the file and file path and then send a "fileopened" message to our Svelte app. Whilst we’re at it, let’s also send a "fileopened" message in the createNewFile function so that when we save the new file, it updates the activeFilePath in the Svelte app:
app.whenReady().then(() => {
  ...

  const createNewFile = (content) => {
    dialog
      .showSaveDialog({
        title: "Create New File",
        properties: ["showOverwriteConfirmation"],
        filters: [
          {
            name: "Markdown Files",
            extensions: ["md"],
          },
        ],
      })
      .then(({ canceled, filePath }) => {
        if (canceled) return;

        fs.writeFile(filePath, content, (err) => {
          if (err) return;

          mainWindow.webContents.send("fileopened", {
            path: filePath,
            content
          });
        });
      });
  };

  const openFile = () => {
    const file = dialog.showOpenDialogSync(mainWindow, {
      properties: ["openFile"],
      filters: [{ name: "Markdown Files", extensions: ["md"] }],
    });

    if (file) {
      fs.readFile(file[0], "utf8", (err, data) => {
        if (err) return;

        mainWindow.webContents.send("fileopened", {
          path: file[0],
          content: data,
        });
      });
    }
  };

  ...
});
Next, let’s add a menu item and keyboard shortcut for opening files:
app.whenReady().then(() => {
  ...

  const menu = new Menu();

  menu.append(
    new MenuItem({
      label: "Save",
      accelerator: "CmdOrCtrl+S",
      click: () => mainWindow.webContents.send("savefile"),
    })
  );

  menu.append(
    new MenuItem({
      label: "Open",
      accelerator: "CmdOrCtrl+O",
      click: openFile,
    })
  );

  Menu.setApplicationMenu(menu);
});
Now if you run npm start, you should be able to click the “open” button in the menu or hit CTRL + O and be presented with a file browser dialog. If you select an existing markdown file, it should open in the editor. We’re pretty much there!
Finally, add a new menu item that will create a new markdown file with some template content:
app.whenReady().then(() => {
  ...

  const menu = new Menu();

  menu.append(
    new MenuItem({
      label: "Save",
      accelerator: "CmdOrCtrl+S",
      click: () => mainWindow.webContents.send("savefile"),
    })
  );

  menu.append(
    new MenuItem({
      label: "Open",
      accelerator: "CmdOrCtrl+O",
      click: openFile,
    })
  );

  menu.append(
    new MenuItem({
      label: "Create New File",
      accelerator: "CmdOrCtrl+N",
      click: () =>
        createNewFile(
          "# You can enter markdown here\n\n**This text is bold**\n\n_This text is italic_"
        ),
    })
  );

  Menu.setApplicationMenu(menu);
});
🎉 You should now have a working markdown editor!
Building for your current platform 🏗️
To package the app, we can use a CLI tool called electron-packager
First start by installing the package locally:
npm install electron-packager --save-devThen remove the
sirv-clipackage from the package.json file (we don’t need this for an electron app).Move the
electronpackage into thedevDependenciesAdd a “main” property to the package json that points to the entry file:
"main": "./main.js"Add a “productName” property to the package json:
"productName": "markdown-editor"Add a “package” script to the scripts:
"package": "npm install && npm run build && electron-packager ."Run
npm run packageto build your electron app for your current platform
This will create a folder with your executable in (on windows) and the relevant files if on mac os. You can check out the electron-packager docs here for more information.
Conclusion
With very little code we’ve managed to build a very basic markdown editor using Svelte and Electron. This blogpost was really just a whistle-stop tour of how to get started, if you want to properly make something, please use the official Electron docs or more indepth tutorials.
Some Extra Notes
We used the Electron and Node APIs by sending messages between the Renderer process (Svelte) and the Main process (Electron) with a bridge between the two in the form of a
preload.jsfile. As mentioned at the start of this post, you can enable the direct use of node.js from within your Svelte files but this is generally bad practice for a whole host of reasons, some extra reading if you’re interested: https://stackoverflow.com/a/59814127 and https://www.electronjs.org/docs/tutorial/context-isolation#context-isolationThis was my first experiment with Electron, please take this guide/tutorial as more of an intro to how it could be used and not how it should be used.
PS: I gave a lightning talk on this at the Svelte London Meetup.